How to Record from CamSoda
Posted by Admin -
• 3 minutes
Record from CamSoda
Learn how to record your favorite CamSoda models using CaptureGem, the powerful desktop recording application that supports CamSoda's streaming format.
What is CaptureGem?
CaptureGem is a desktop application for Windows and macOS designed to record from various cam sites including CamSoda. It offers parallel recording capabilities, automatic start when models come online, and comprehensive library management through its review feature. CaptureGem is optimized for user-friendliness, high performance, and lightweight operation with both free and premium tiers available.
Step 1: Download CaptureGem
Start by downloading CaptureGem from the official website. Select the appropriate version for your operating system (Windows or macOS). The download is completely free with no signup required.
After downloading, extract the file to a new directory. On macOS, you can optionally move it to your Applications folder. Launch CaptureGem by double-clicking the executable file.
Step 2: Navigate to CamSoda
Go to the CamSoda page featuring the model you want to record. Note the model's username from the URL, as CamSoda usernames are case-sensitive and will be needed for the recording process.
Step 3: Start Recording in CaptureGem
Paste the CamSoda model's username into the designated field in CaptureGem. Click "Add Model" to begin the recording process. The application will automatically connect to CamSoda's streaming service and start capturing the content.
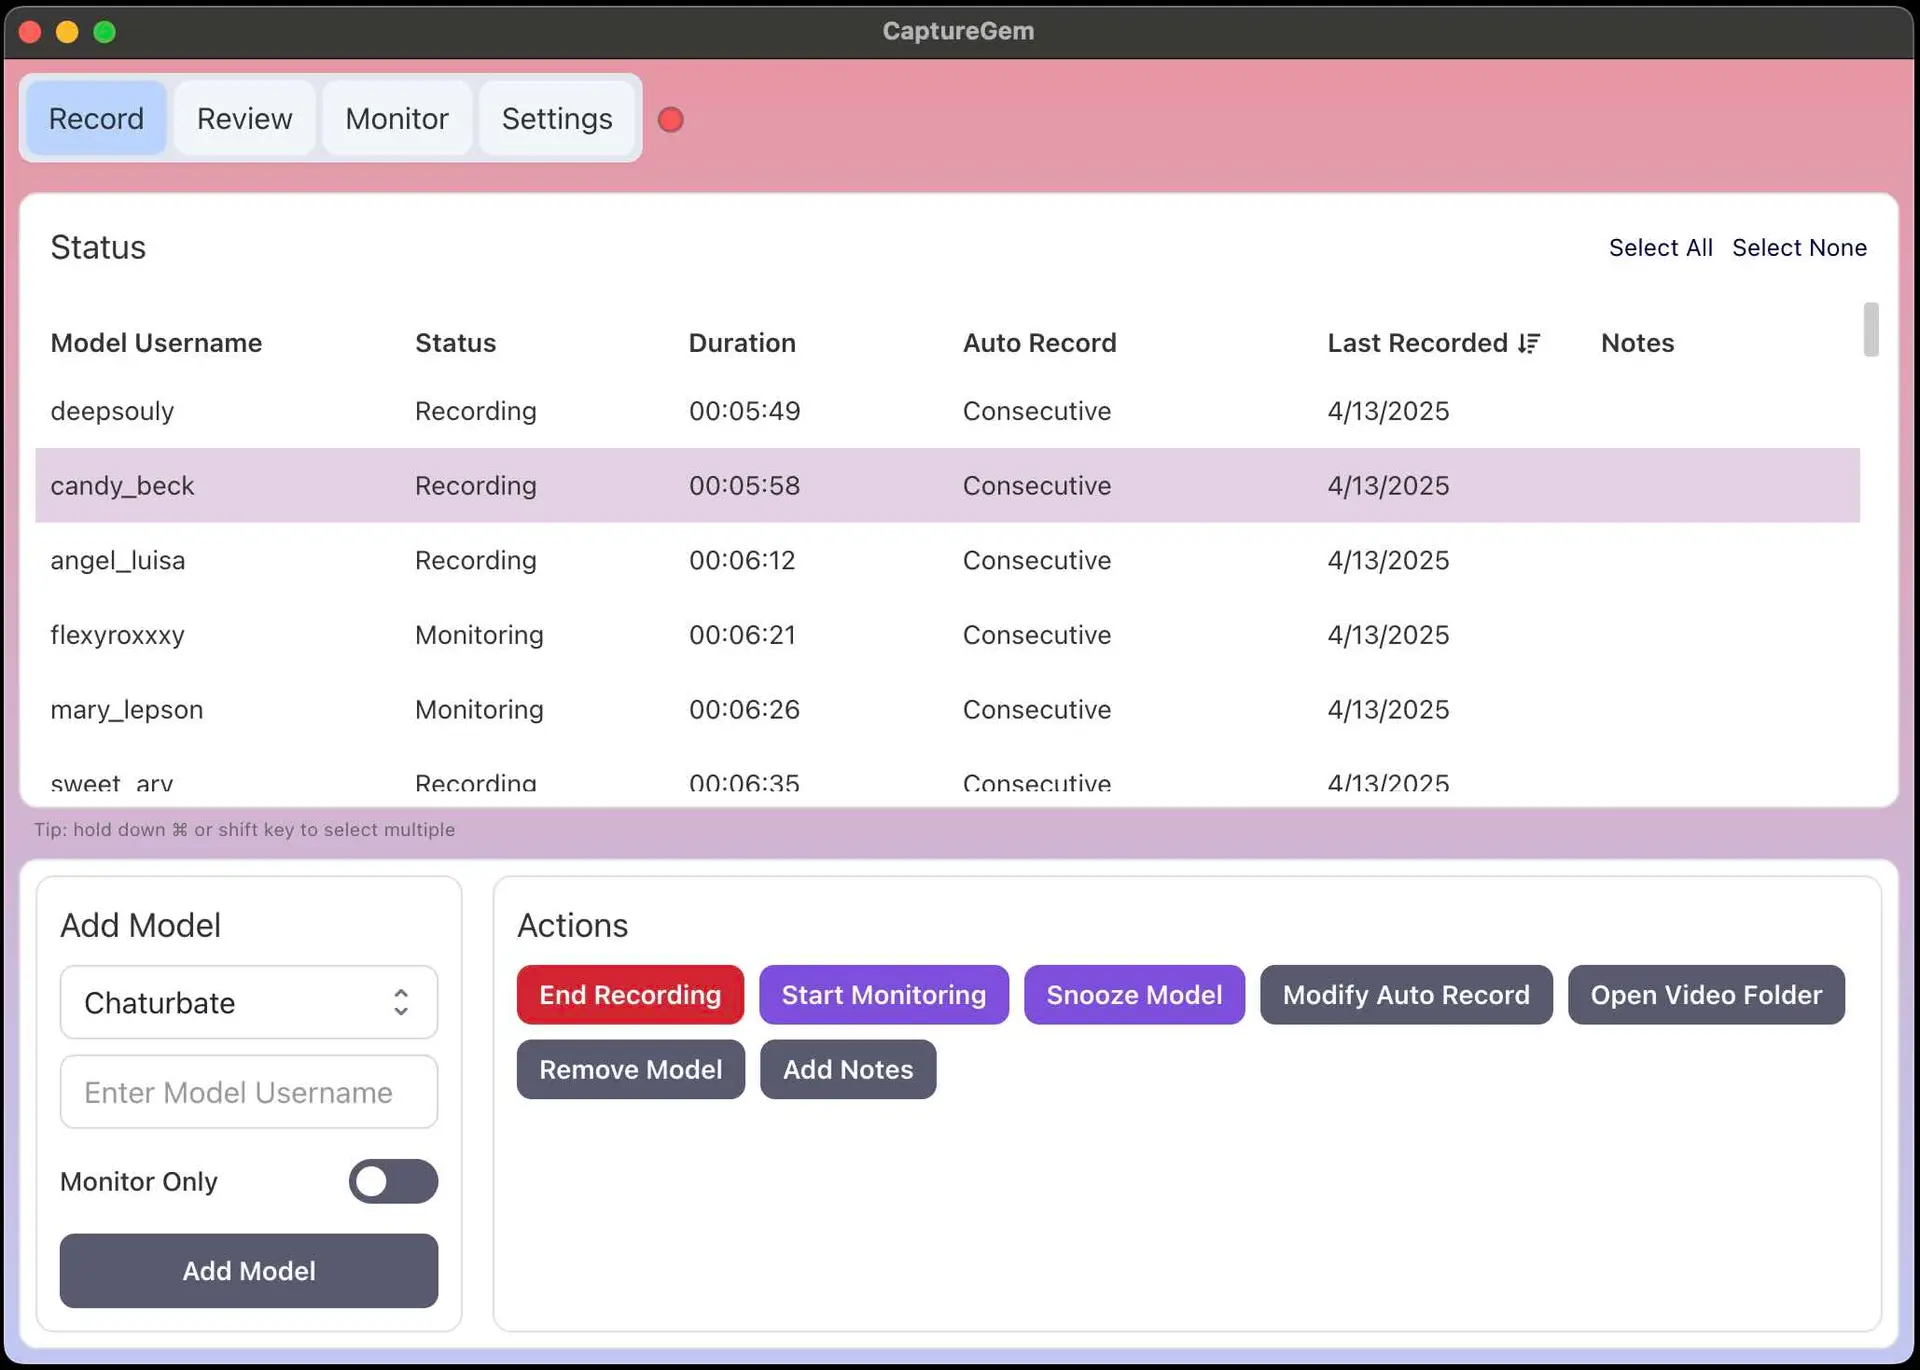
You can record multiple CamSoda models simultaneously, limited only by your network bandwidth and system resources.
Step 4: Monitor Your Recordings
Click the "Monitor" button to view all your CamSoda recordings in real-time. This feature provides live thumbnail previews and recording status updates. While monitoring uses additional processing power, it doesn't consume extra bandwidth.
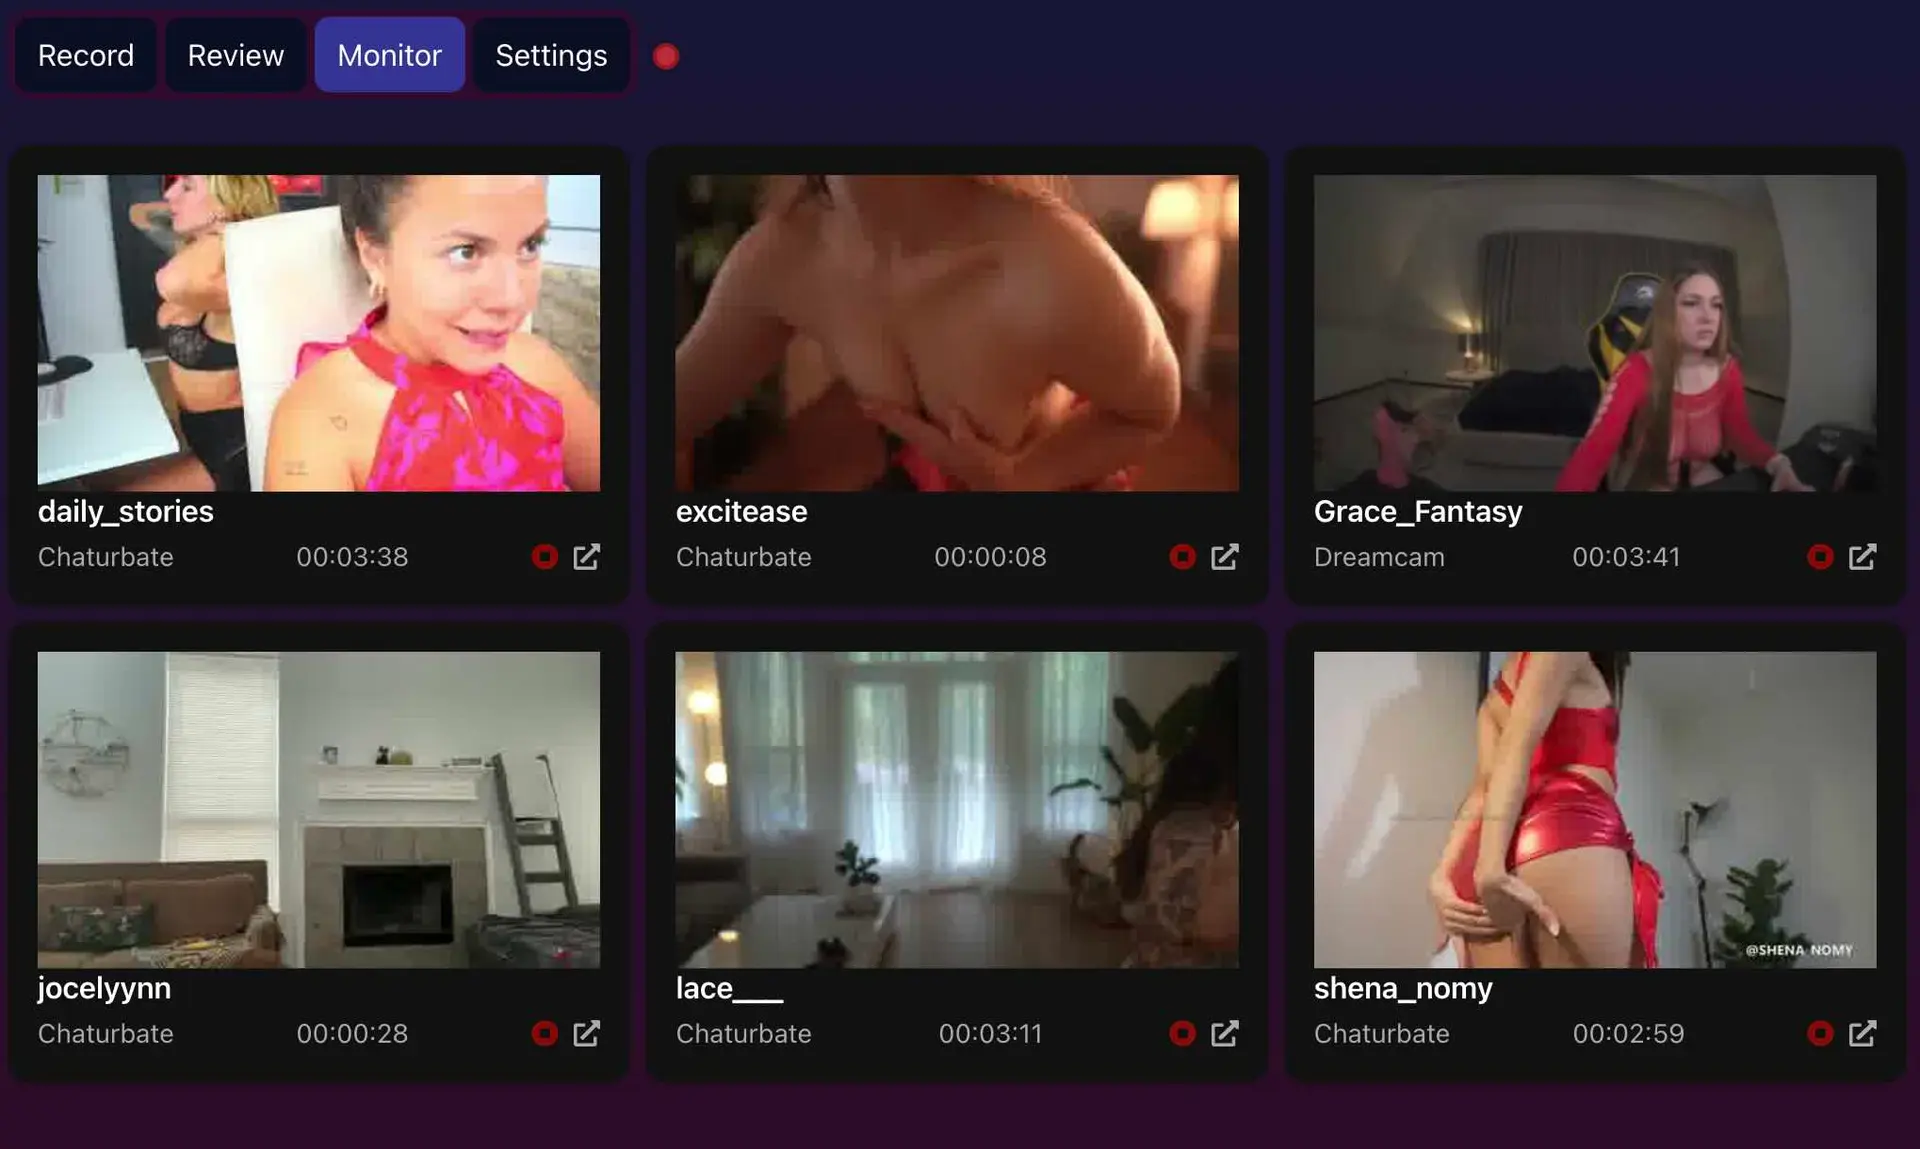
You can also open the model's page directly from the monitor interface and control recording sessions. Adjust thumbnail refresh rates in the Advanced Settings if needed.
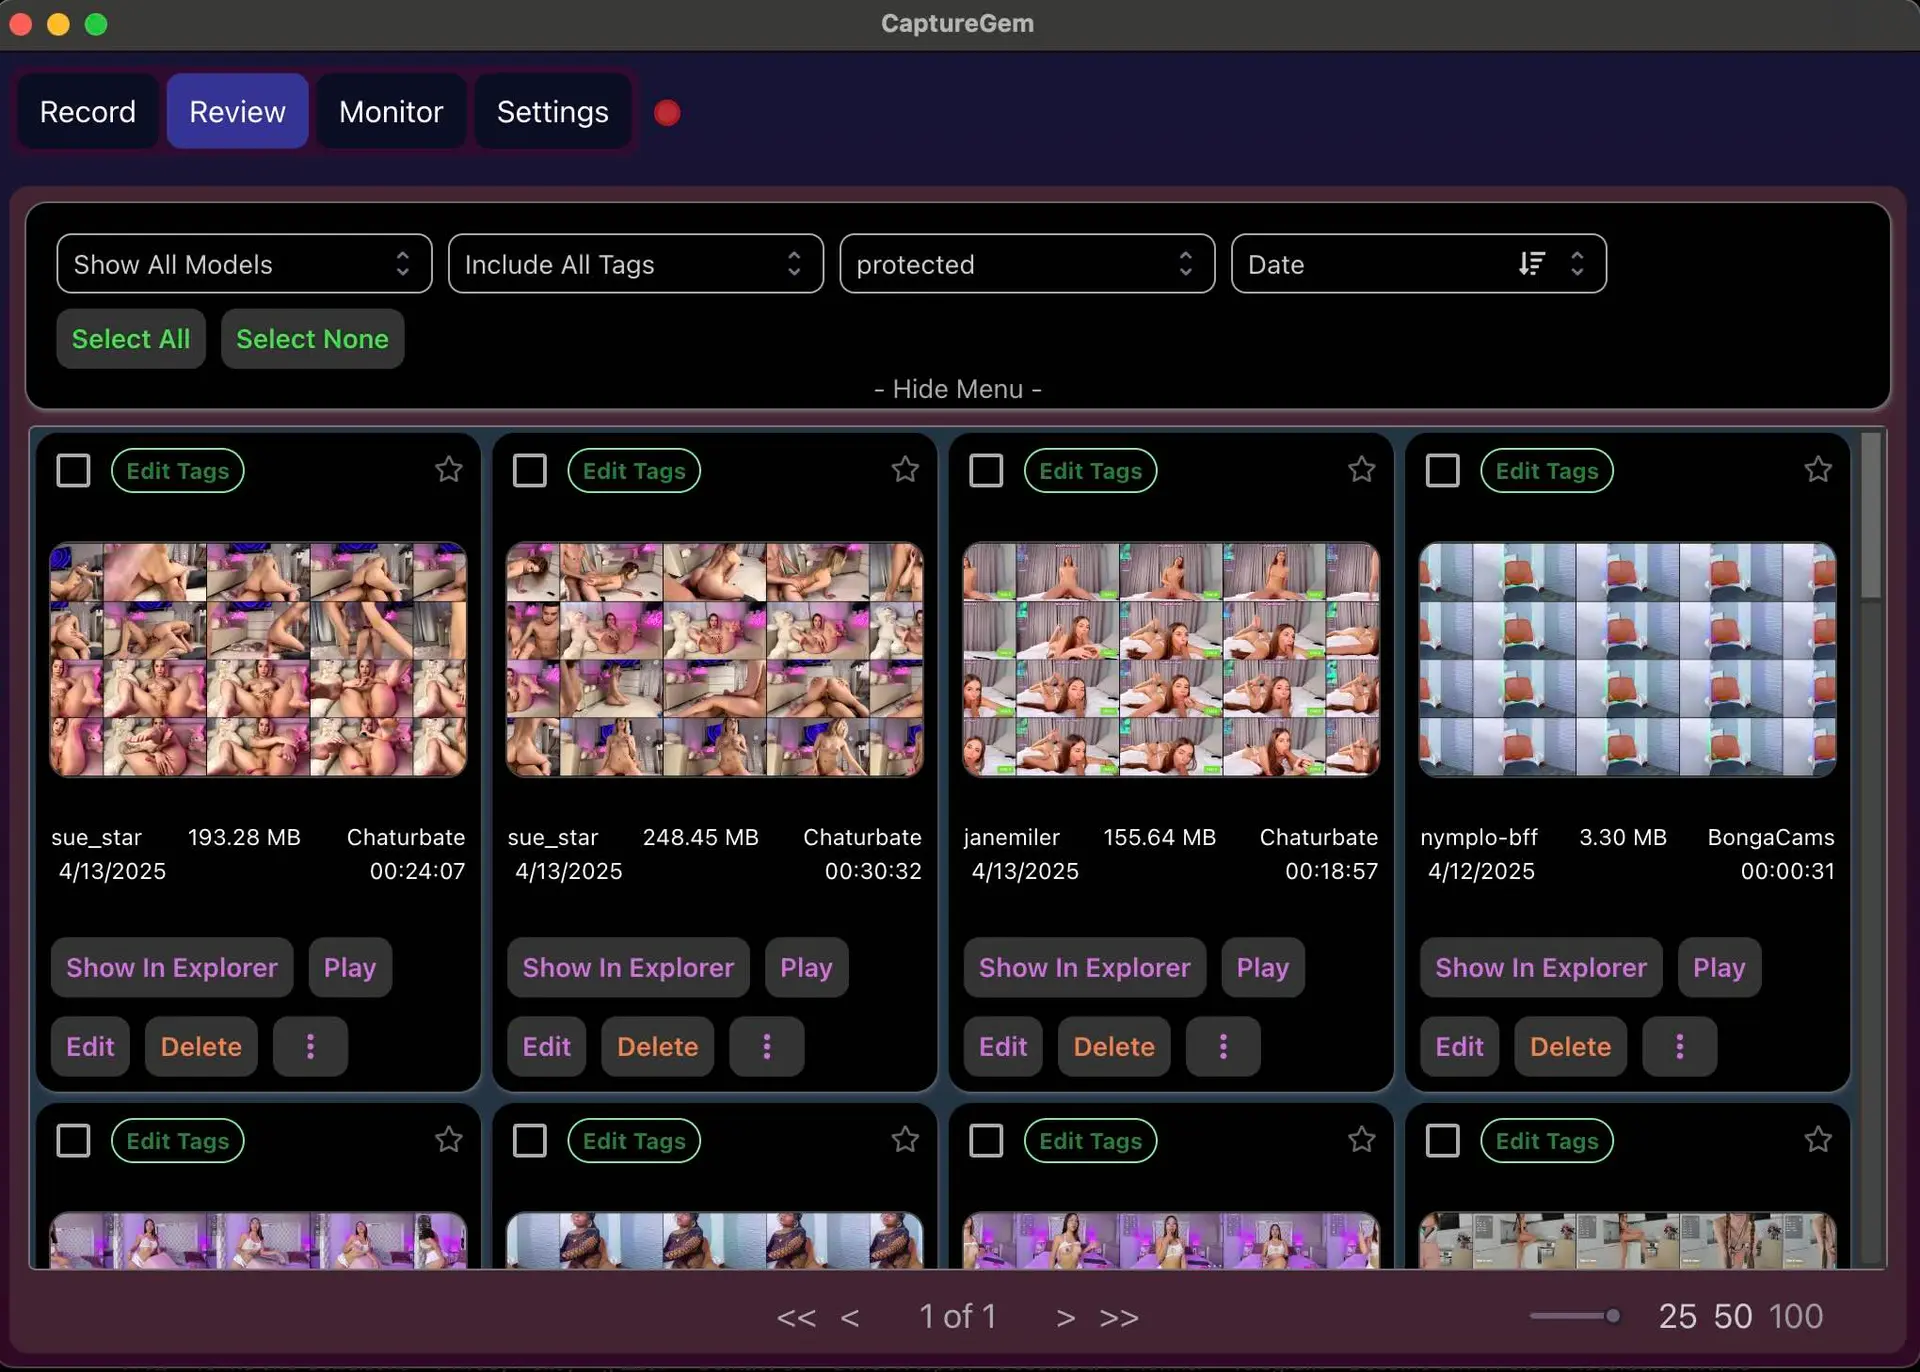
Step 5: Review and Edit Recordings
Once recording is complete, navigate to the Review tab. CaptureGem will automatically generate screenshots (this may take a few seconds depending on recording length). From here you can:
- Play the recorded video
- Edit recordings to remove unwanted sections
- Delete recordings
- Access the recording directory
- Add tags or mark as favorites
Additional Features
Hover over the top-right corner of screenshots to expand them for detailed viewing. This works particularly well with CamSoda's high-quality stream captures.
Customizing Settings
Access the Settings tab to adjust CaptureGem's configuration to your preferences. Settings are divided into basic and advanced categories, allowing you to modify recording lengths, network timeouts, output directories, UI themes, and language preferences. For CamSoda recordings, consider adjusting quality settings to match the platform's stream quality.

Ready to Start Recording from CamSoda?
Download CaptureGem now and begin recording your favorite CamSoda content in high quality. Visit capturegem.com to get started!